Hi Everyone,
Was messed up with work, so couldn’t post last 2 days. Better late than never. Today I am covering how to connect to wi-fi network using command line(raspberry pi). So have a look –
Step 1 –
Leave your wi-fi adapter placed on table. No need to connect it for now and open Linux terminal by clicking on its icon.
Step 2 –
Write following command and press ENTER –
$ sudo nano /etc/network/interfaces
Step 3 –
Editor window will open –
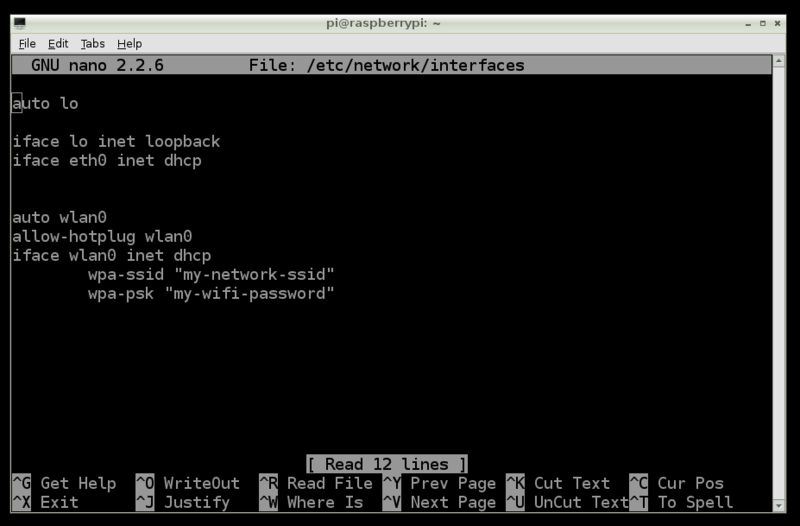
Step 4 –
Change text in quotes against ‘wpa-ssid’ option with your SSID (wi-fi network name) and text against ‘wpa-psk’ option with your wi-fi network password(security key).
Step 5 –
To save this file press CTRL+O and then press ENTER
Step 6 –
Shut down your raspberry pi, plug wi-fi adapter in USB port and Restart it. Your raspberry pi will automatically get connected to your wi-fi network.
Tomorrow i will be covering some wi-fi and ethernet issues of raspberry pi as promised in my previous post. Till then – Stay Tuned – Stay Connected 🙂
And please don’t forget to give your comments and feedback. I am quite hungry of them.
